Invexa user guide Everything you need to send your first invoice
Invexa handles your quotes, invoices, recurring billing and customer statements in one place — from your laptop or your phone, with nothing to install. This guide walks you through it, screen by screen.
About the screenshots. They show a fictional business, Karoo Coffee Roasters, so you can see a system already in use. Yours will show your own company name, logo and customers.
01
Signing in
Your Invexa lives at your own web address, and only you can get into it.
Open your browser and go to the web address we set up for you — it will look like invexa.yourcompany.co.za.
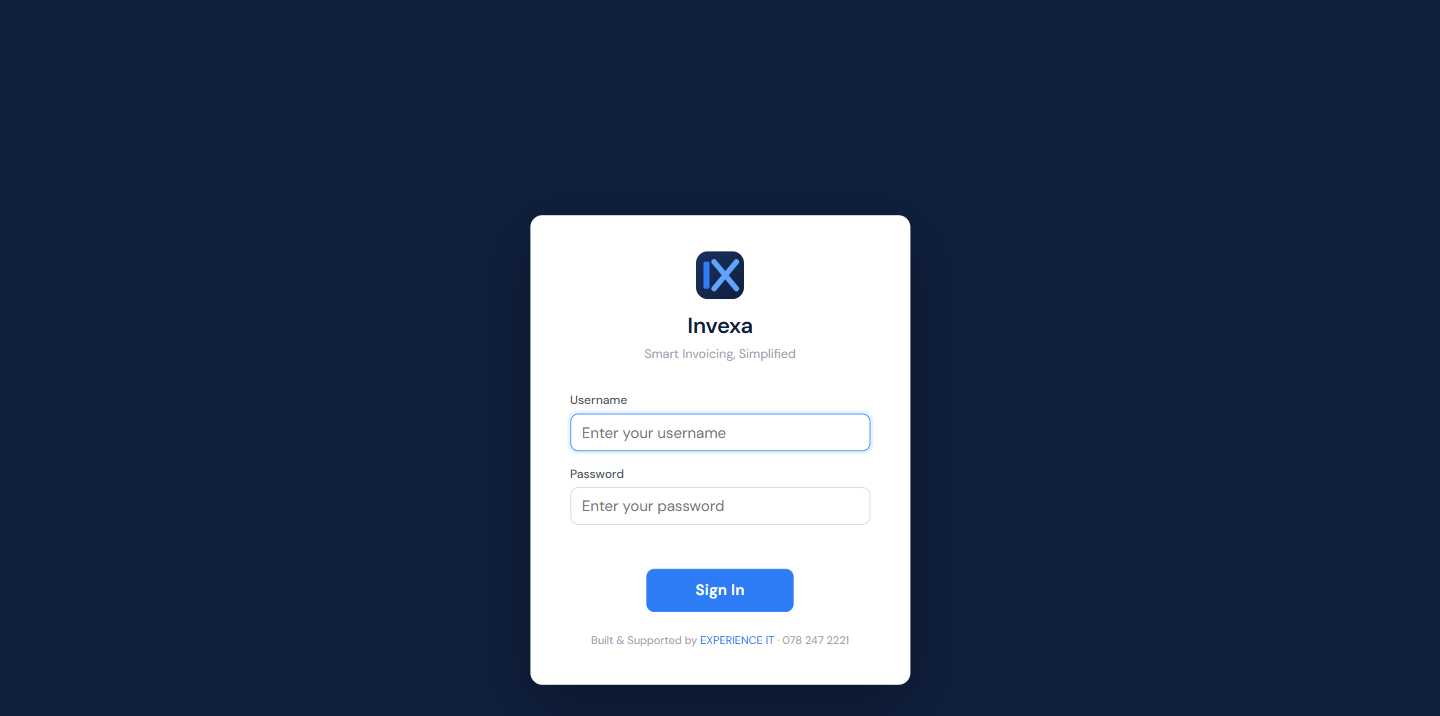
Enter the username and password we supplied.
Click Sign In.
The sign-in screen. Bookmark this page, or add it to your phone's home screen for one-tap access.
Tip for phones. The username is not case sensitive, so autocorrect capitalising the first letter will not lock you out.
If you forget your password, don't keep guessing — Invexa locks the login for a short while after several wrong attempts, and the wait gets longer each time. Phone us instead and we'll reset it in a minute.
02
Your dashboard at a glance
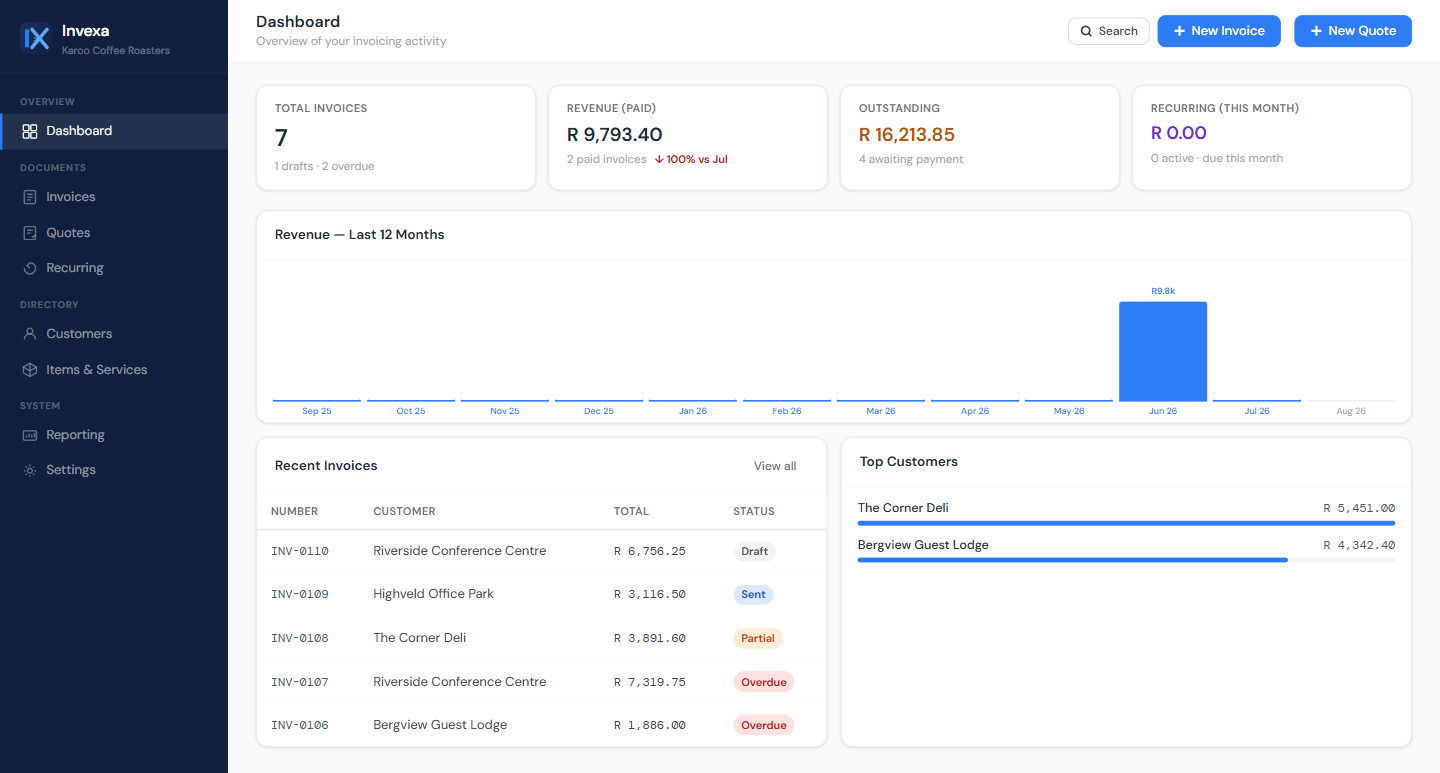
The first screen after signing in answers the only question that matters in the morning: who owes me money?
The four figures across the top update themselves as you invoice and get paid.
Total invoices
Everything you've raised, with drafts and overdue counted underneath.
Revenue (paid)
Money actually received — not merely invoiced.
Outstanding
What's still owed to you. This is the number to watch.
Recurring
Invoices due to go out automatically this month.
Down the left is the menu you'll use for everything: Invoices, Quotes and Recurring for documents; Customers and Items & Services for the details they're built from; Reporting and Settings underneath.
03
Set up once: your items & services
Spend ten minutes here and every invoice afterwards takes seconds.
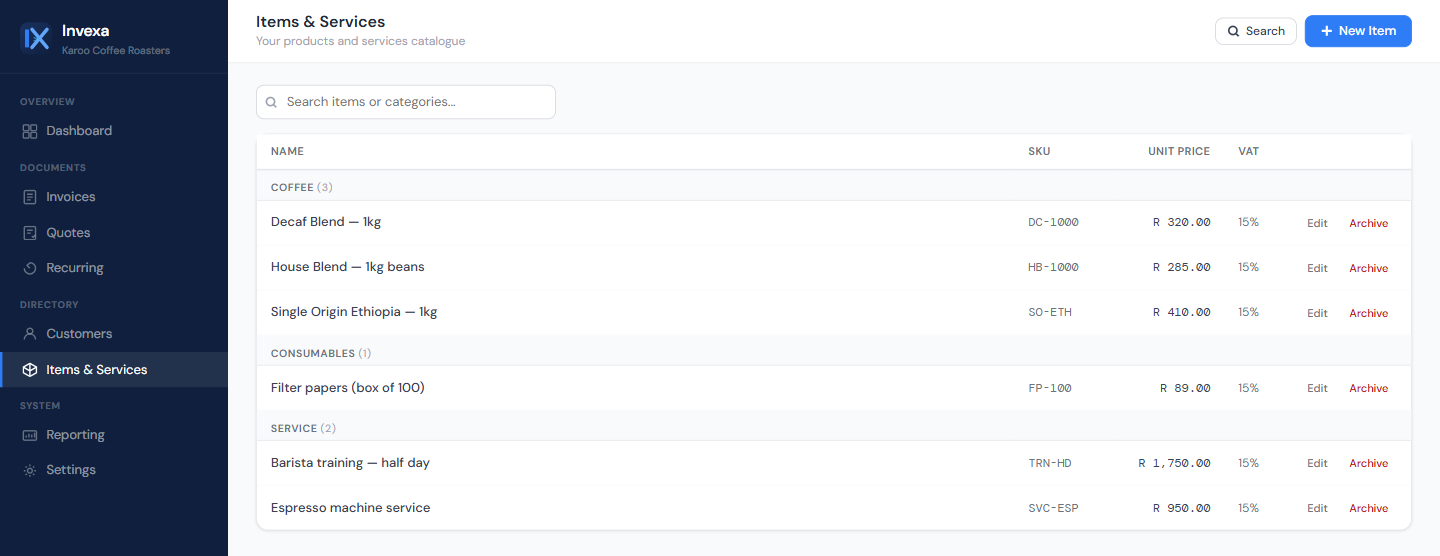
An item is anything you sell — a product, or an hour of your time. Save it once with its price and VAT rate, and it becomes a pick-list entry on every invoice and quote you ever write.
Click Items & Services in the menu.
Click + New Item.
Give it a name, a price and a VAT rate — plus a code and unit if it helps you.
Click Save.
Your price list. Change a price here and it applies to new documents — invoices already sent keep the price they were sent at.
You don't have to add everything up front. Start with the ten things you sell most. You can always type a one-off line straight onto an invoice without saving it as an item.
04
Adding customers
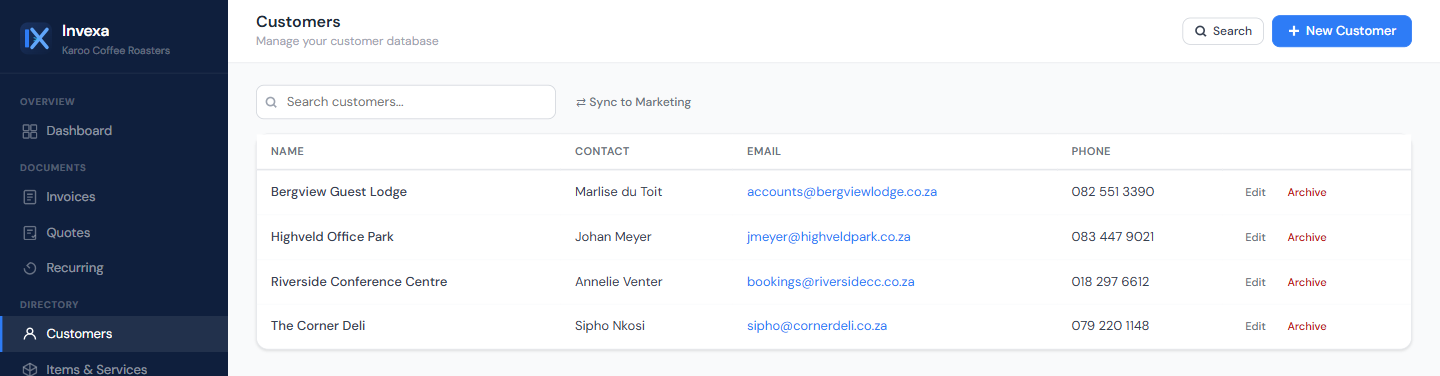
Capture a customer once and their details fill themselves in from then on.
Click Customers, then + New Customer.
Fill in the name and — importantly — the email address, since that's where invoices and statements go.
Add their VAT number if they need it on the invoice.
Click Save.
Click a name to see everything you have ever sent them and what they still owe.
Nothing is ever really deleted. If you stop dealing with a customer, use Archive. They disappear from your day-to-day lists, but every invoice you sent them stays intact and correct.
05
Creating an invoice
The heart of it. About thirty seconds once your items and customers are in.
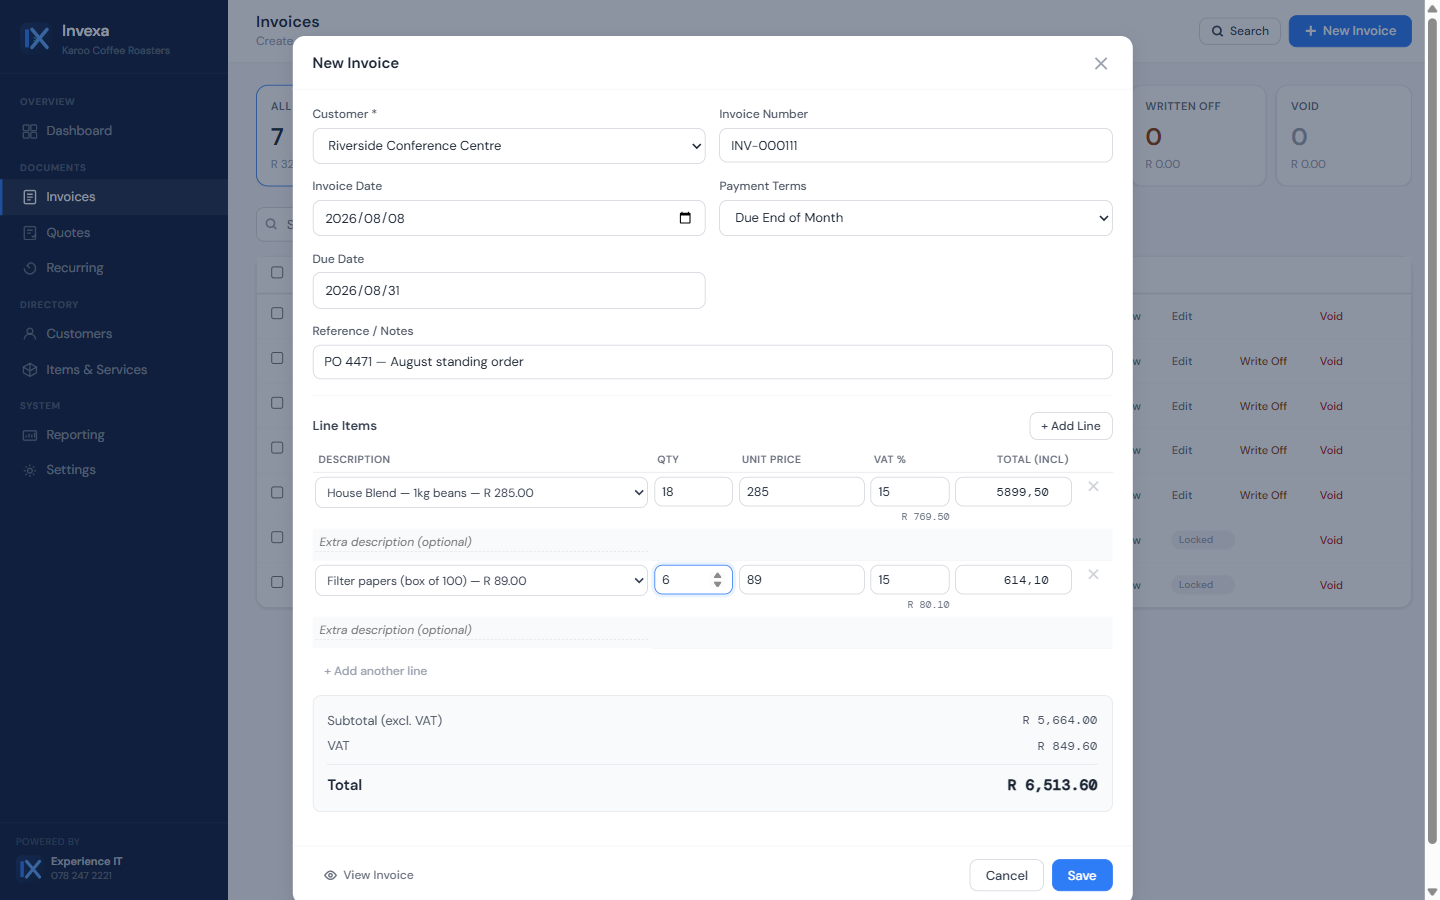
Click Invoices, then + New Invoice.
Pick the customer. Their details attach themselves to the invoice.
Choose payment terms — the due date works itself out.
On each line, pick an item and set the quantity. The price and VAT come with it.
Add a reference if your customer needs a PO number on the invoice.
Click Save.
A part-finished invoice. Terms were set to "Due End of Month", so the due date filled itself in — and the totals update as you type.
The Total column is VAT-inclusive, and you can type into it. If you've agreed a round R2,000 including VAT, type that into the total and Invexa works the unit price backwards for you.
06
What your customer receives
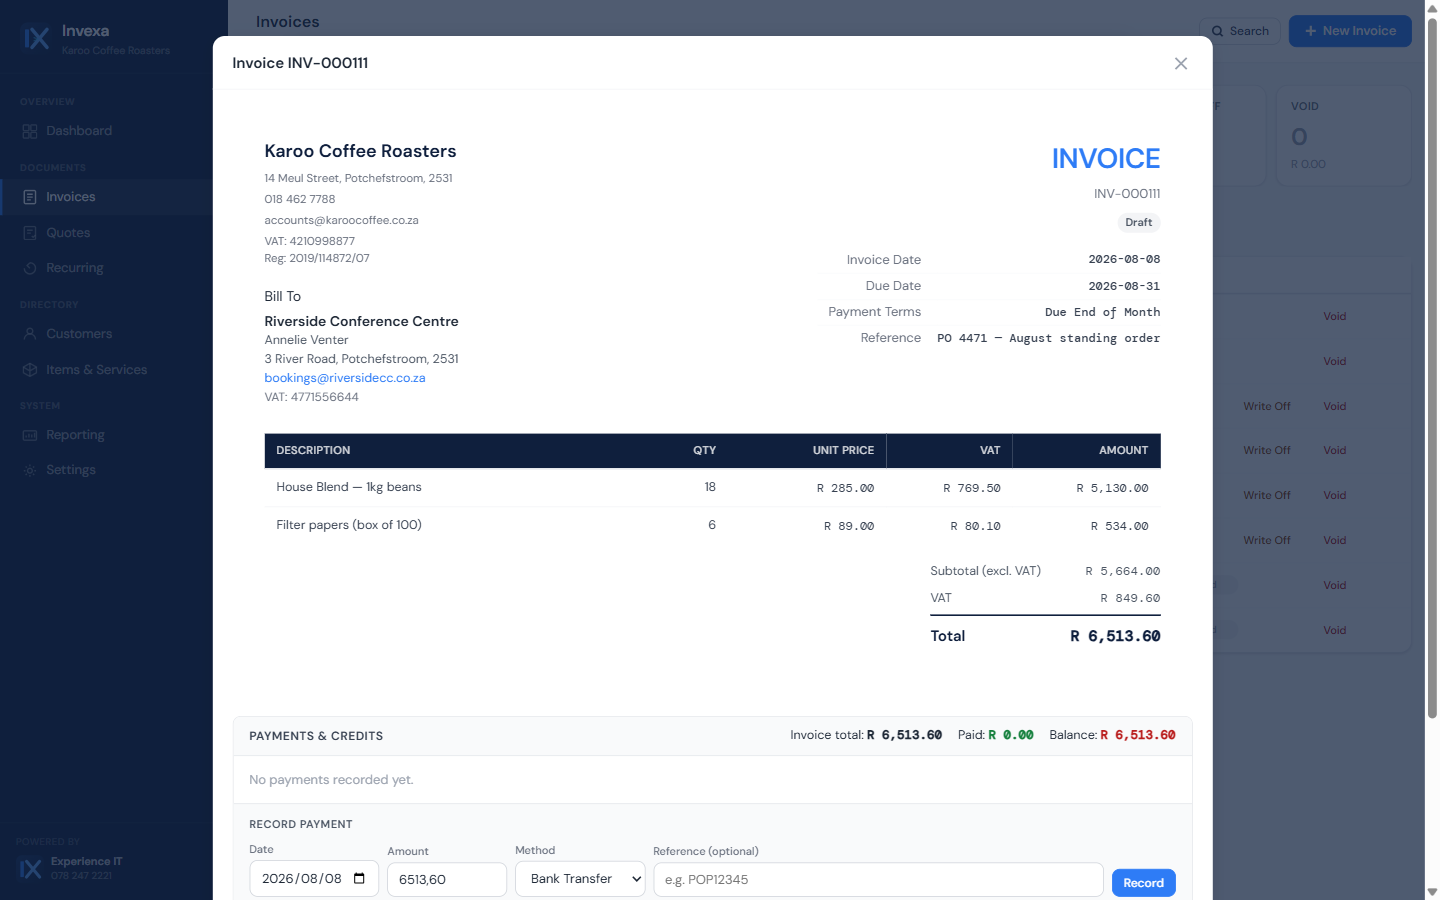
Click View Invoice at any point to see exactly what they'll see.
Your details, theirs, the lines, the VAT split and the total — precisely what gets emailed and attached as a PDF.
From this screen you can Email it to the customer, Download the PDF, or Print it. The email carries the PDF as an attachment, so there's nothing else to do.
The number your customer reads is the number everywhere. The figure on the email, the PDF and this screen are calculated in one place, so they can never disagree.
07
Invoice statuses, and getting paid
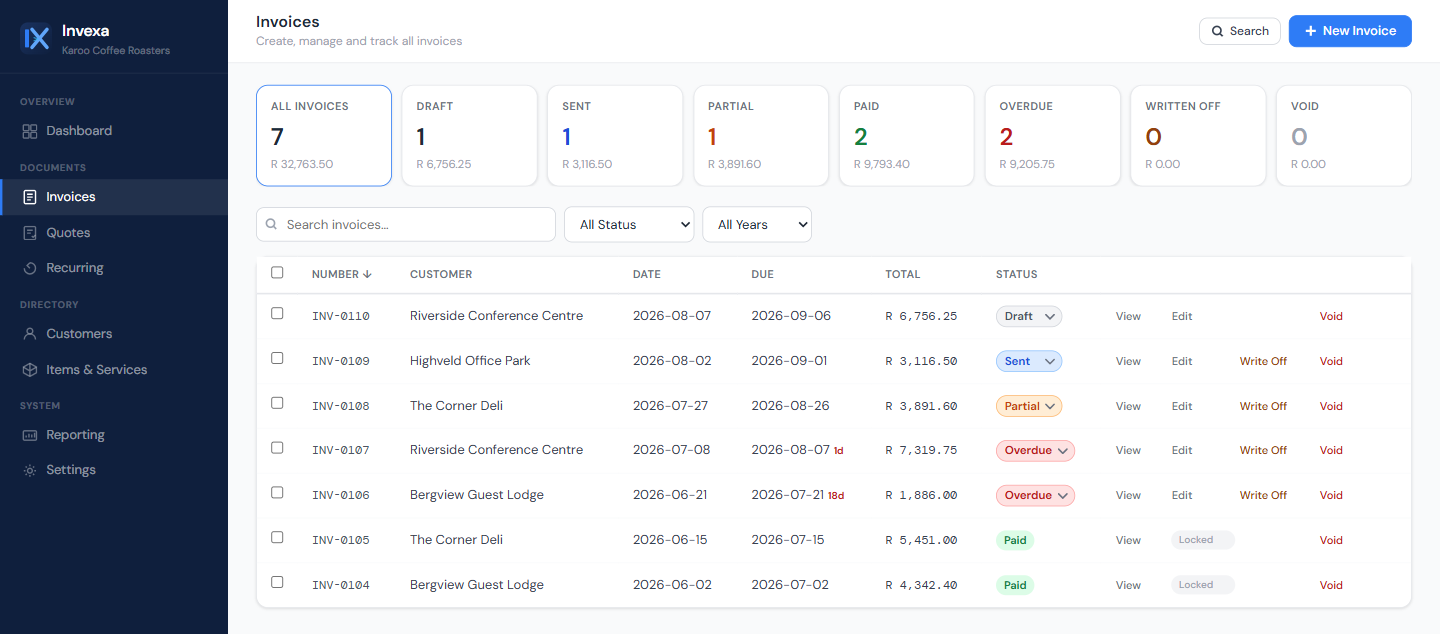
Every invoice carries a coloured badge. That badge is your whole debtors book.
Status
What it means
Draft
Started but not sent. Only you can see it, and you can still change anything.
Sent
It's with the customer and the clock is running.
Partial
Some money received, a balance still outstanding.
Paid
Settled in full. Locked, so it can't be altered after the fact.
Overdue
Past its due date and still unpaid. The days late are shown next to it.
A running total per status across the top. Click any of those cards to filter the list beneath it.
Recording a payment
Open the invoice and scroll to Payments & Credits.
Enter the amount, the date and how they paid.
Click Record — the status moves to Partial or Paid on its own.
08
Quotes
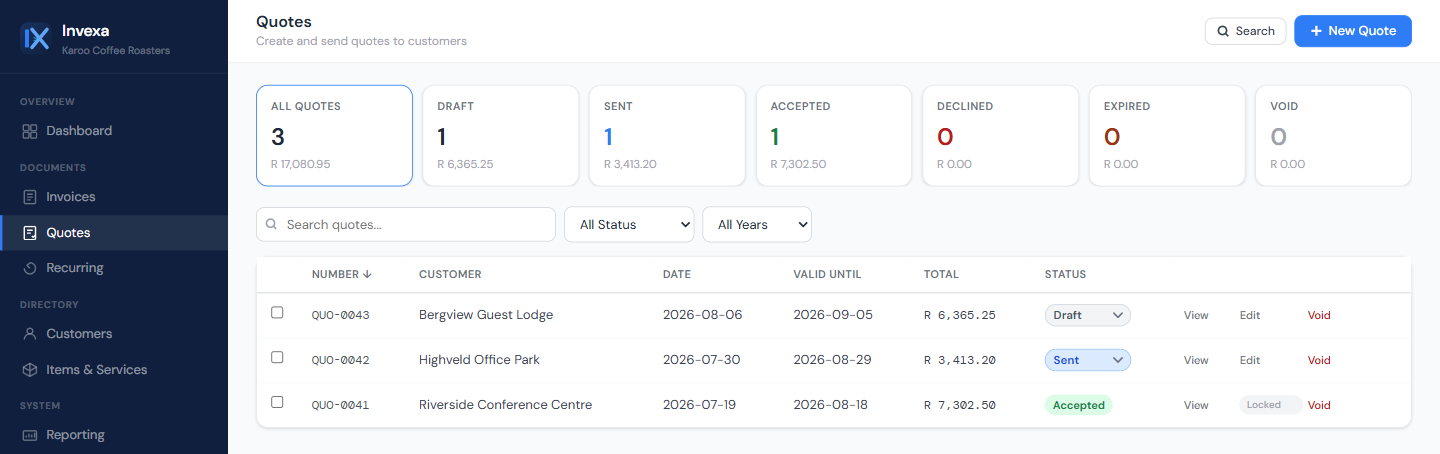
Quotes work exactly like invoices — with one very useful extra.
Build a quote the same way you build an invoice. When the customer accepts it, you don't retype a thing: convert the quote into an invoice in one click, and every line, price and discount comes across.
Quotes expire on their own once past their valid-until date, so your pipeline stays honest.
Click Quotes, then + New Quote.
Build it exactly as you would an invoice.
Email it to the customer.
When they accept, open it and click Convert to Invoice.
Win rate. Because Invexa knows which quotes turned into invoices, the Quotes report can tell you what proportion of your quoted work you actually win — by value, not just by count.
09
Recurring invoices
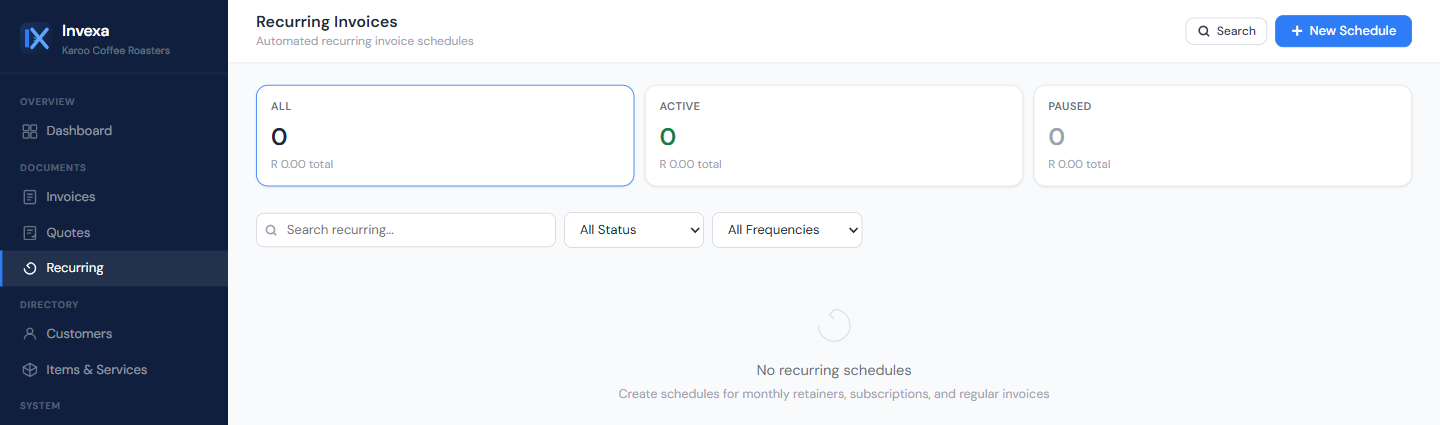
For anything you bill on the same day every month. Set it up once and stop thinking about it.
Click Recurring, then + New Schedule.
Choose the customer and build the invoice lines as usual.
Set how often it repeats — weekly, monthly, quarterly or yearly — and the date of the first one.
Click Save. Invexa raises and emails each invoice on the day, by itself.
Each schedule shows when the next invoice goes out, and you can pause one at any time without deleting it.
Month-ends are handled properly. A schedule anchored to the 31st bills on the 30th, or the 28th in February — it will never skip a month or drift onto the wrong date.
10
Statements & reports
For chasing money, and for your accountant.
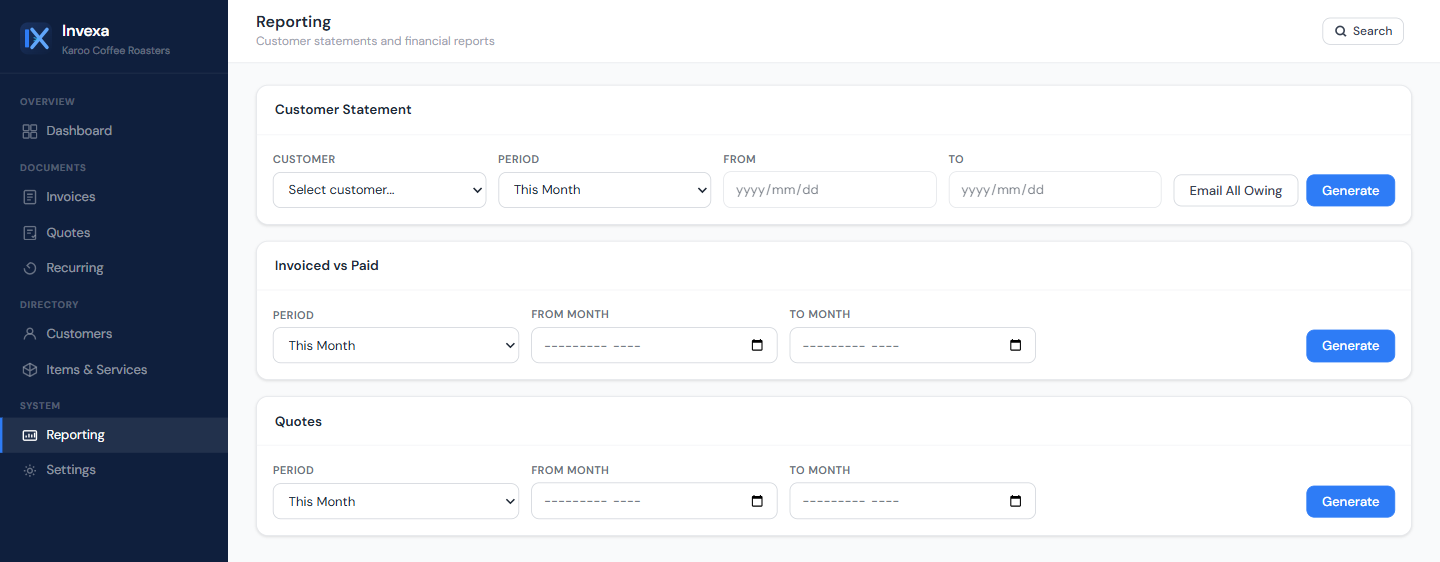
Every report can be printed, saved as a PDF, or emailed straight from here.
Customer statement
Everything one customer owes, aged into current, 30, 60 and 90+ days.
Email all owing
Sends every customer with an outstanding balance their own statement, in one click.
Invoiced vs paid
What you billed against what you actually collected, over any period.
Quotes
Your win rate by value — quoted versus converted.
Chasing late payers, automatically
Invexa emails polite reminders on your behalf as invoices age — a gentle nudge first, then a firmer one, then a final notice, with the invoice attached each time. It stops the moment they pay, and it never sends a final notice to someone who was never reminded before.
11
Getting help
You have a person, not a ticket queue.
A few things worth knowing
Your data is backed up every night, off-site. You never have to think about it.
Nothing is permanently deleted. Customers and items are archived; paid invoices are locked rather than removed.
Made a mistake on a sent invoice? Void it — it keeps its number for your records and drops out of every total.
It works on your phone. The same address, the same login.
Changing your company details or logo
Everything that appears on your documents — company name, address, VAT number, logo, bank details and the standard terms at the foot of an invoice — lives under Settings. Change it there and every new document picks it up.
Stuck on something?
Phone or WhatsApp — we would far rather spend two minutes on the phone than have you fight with it.
Monday to Friday, 08:00–17:00 · Invexa is built, hosted and supported by Experience IT.